One of the most important parts of our platform is to host your mailing list. Here's how to get your data to us.
To send hundreds or thousands of recipients you'll need a mailing list. Once you've started setting up your first bulk campaign and are happy with it's design, it's time to upload your data.
To first find your mailing lists go to our mailing list tab and click Recipient Groups.
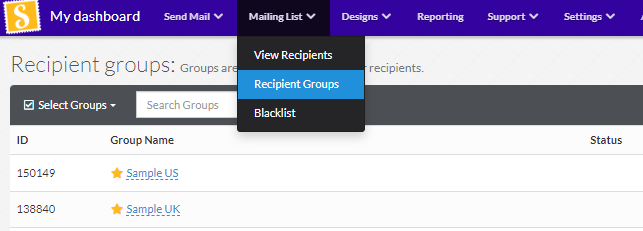
From here you'll be able to see all of your mailing lists. Any important mailing lists can be favorited by clicking on the star by their name. These mailing lists will always appear at the top whenever you have to select data.
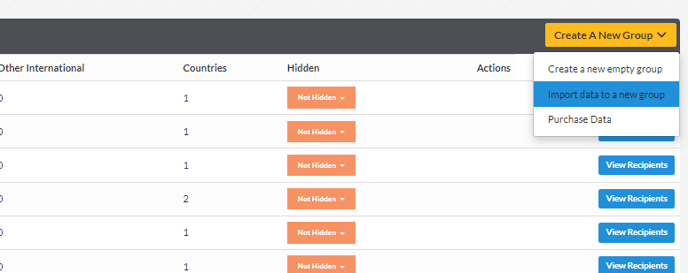
To create a new group, click create a new group and import data to a new group on the right hand side of your screen. This is the best way to get your data to us.
Alternatively, if you don't have any data yet, you can always buy data from us instead! Simply click the purchase data button instead.
Your mailing list has to be provided to us in a CSV, XLS or XLSX format. However, we recommend to always use CSV where possible. Also ensure your file contains heading names so your data can be mapped and identified correctly.
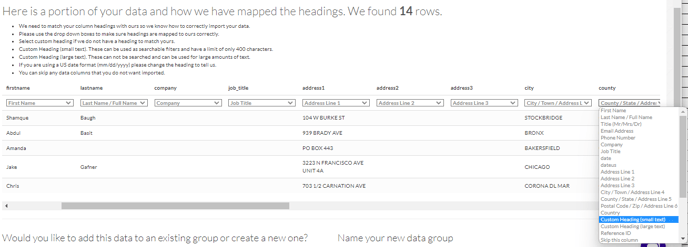
Once you've uploaded your data you can check each of your columns to see if they've been mapped to the right heading.
Please note, if address line 1 and your zipcode have not been mapped correctly, the address will not validate on our system. This can mean it might cost more to send your mail as it does not match the US Postal Service's database.
As you can see if your heading is appropriately named it will automatically map to the right field. If the heading is slightly off it will default to "Custom Heading (Small text)". This heading is used for any custom variable fields that you might wish to add to your data, select this option to generate your custom field. If the column is a standard field, like Name, address, company, city, state and zipcode make sure to map it to one of our columns. If your data is not mapped correctly, you can simply change this here by clicking into the drop down.
 You can also skip any columns that are not relevant to your mailing. Custom heading (small text) should be used for all variables by default. If you have a large volume of text and characters in your variable, Custom heading (large text) should be used. Please note when viewing your data in your mailing list you will not be able to see any custom large text.
When using custom variable fields we always recommend making the variable first in the column settings rather than generating it here. If you want to know more about setting up custom variable fields, we have an article for that, click here.
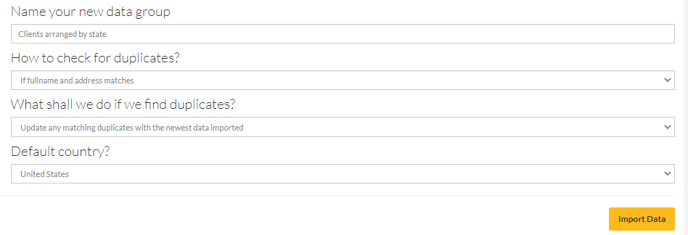
The final step is to check through your data settings. Give the mailing list a name to easily find later, and decide what you would like us to do with duplicated entries. Our system and easily identify duplicated data by full name and address. If you want to make sure all of your recipients are uploaded, we recommend selecting the "insert all duplicates as unique records" option.
 Once uploaded, it will be displayed in your groups. It will give you a breakdown to the verified and not verified recipients along with any international records in your mailing list.
Select the data when creating a bulk campaign and you're off to go!