Three simple steps to enable the auto top-up feature
First, head to your billing settings
You can find everything to do with your finances on the billing settings tab. On our platform, first click settings then select billing settings.

Second, add and review card information
To the right you can see all of your card details. To add a card to the system, you'll need to top up your balance. This is so we can verify the integrity of the details added. You can top up your balance without saving your card if you wish for this to be a one time payment.
After multiple cards are added be sure to select which one you wish to use as your default. This is also important for enabling automatic top ups. See below for more!
Third, add low balance reminders
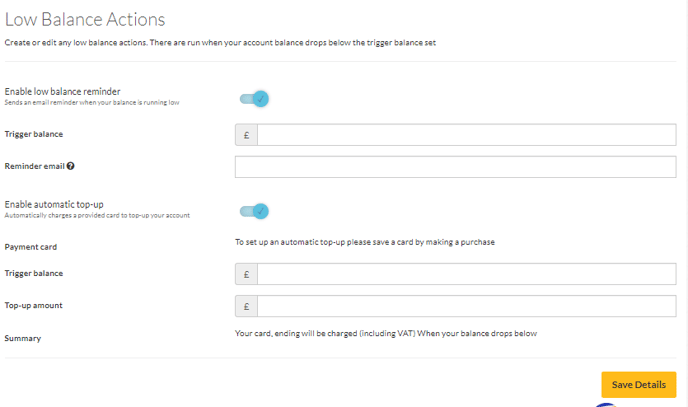
In this section we have two options, first to enable a low balance reminder. This will send you an email whenever your balance is running low. You can enter what you consider to be low under trigger balance and auto enter which email you would like to be notified. Use a comma separated list for multiple email addresses.

Additionally you can enable automatic top ups.
This is useful if you have several automated API workflows.
The trigger balance is the threshold. After paying for a campaign or sending an API item, if your balance ever gets set below this amount it will add balance from your default card by the top-up amount.
To reiterate the top up amount is how much your balance will be increased by if it ever goes below the trigger balance threshold.
Bonus feature! Billing address
It's important to keep your active billing address up to date as we use this when generating invoices. If you have multiple billing addresses added you can edit, delete and set the correct one as the default billing address. Do this at any time.

On the billing settings page you can change all of those features here.
